
目录
安装 SCL 工具和 Simpleware 软件
- 试用用户获得的均为节点锁定(node-locked)license,直接参照第二部分 “ 在 Windows 系统安装 Simpleware ScanIP ”部分说明即可。
- 正式用户获得的为浮动(floating)license,在 license 绑定的设备上安装 license server 和 Simpleware 软件后,同一局域网内其他设备均可安装使用 Simpleware 软件。在绑定设备保持运行状态时,同时仅能有一台设备在使用软件。
1. 安装 license server
1.1 准备
在使用 license key 激活浮动许可系统之前,请务必确认一下内容:
- 确定哪台电脑是 server,哪些电脑作为客户端。
- 默认情况下,浮动许可系统使用端口 27020 用于客户端和服务器之间的连通。如果您希望使用其他端口(例如其他应用程序已使用了 27020),请参阅下文。
1.2 在 Windows 系统设置 license server
正式用户在SolvNet 注册账号,从 Download 频道下载 Synopsys Common Licensing (SCL)工具,然后开始安装:
- 右键单击scl_2021.12_windows.exe,选择以管理员身份运行
- 在 Welcome to the SCL 2021.12 Setup Wizard 对话框点击 Next
- 在 Site Information 对话框,输入您的 Site ID、管理员和联系信息,点击 Next。
- 在 License Agreement 对话框,阅读协议内容,接受条款勾选 I accept the terms of the License Agreement,点击 Next。
- 在 Choose Install Location对话框,接受默认目标文件夹,或单击 “Browse…”选择自定义位置。安装所需的空间和所选文件夹中的可用空间将显示在下面,点击 Next。
- 在 Start Copying Files 对话框,检查所选设置,然后单击 “Accept, Next” 开始安装 SCL。
- 在 Installing 对话框将会显示安装进度。
- 点击 Completing the SCL 2021.12 Setup Wizard 对话框的 Finish 关闭安装程序。
1.3 修改 license 文件
正式用户从SolvNet下载的license文件即Synopsys_Key_Site_XXXXX_snpslmd.txt 文件必须要先经过编辑,添加绑定设备的信息。只需要修改SERVER和VENDOR所在行(示例如下)的信息即可:
  SERVER hostname1 1a2b3c4d5e6f 27020
  VENDOR snpslmd /path/to/snpslmd
(1)修改SERVER行,使其包含绑定电脑的hostname信息。如有需要,也可在此处修改端口号。Windows系统电脑获取本机hostname方式:打开运行,输入cmd启动命令行提示符窗口,输入hostname后显示的即为所需信息。例如得到的服务器名称为my-server,则修改之后应为:
SERVER my-server 1a2b3c4d5e6f 27020
(2)修改VENDOR行中snpslmd的路径,建议您添加port=27021(或者是27021-27030之间的其他端口)。例如:
VENDOR snpslmd C:\Synopsys\SCL\2021.12\win32\bin\snpslmd.exe port=27021
(3)将修改后的license文件保存在 \admin\license\的子目录下,修改文件名称(例如synopsys.lic)。默认的Windows安装目录为:
C:\Synopsys\SCL\2021.12\admin\license\synopsys.lic
1.4 设置 LMTOOLS 并启动 license server
SCL 安装成功后会在系统 “启动 > 所有应用 > Synopsys” 下创建开始菜单项。按以下步骤将 lmgrd 程序配置为 Windows 中的服务器运行:
- 调用 LMTOOLS:开始 > 所有应用 > Synopsys > 2021.12 > LMTOOLS
- 在 Service/License file 选项卡,选择 Configuration using Services
- 在 Config Services 选项卡:
- 输入 Service Name(例如Simpleware- License-Server)。
- Path to the lmgrd.exe file:点击 Browse 浏览 lmgrd.exe 在 SCL 安装目录下的路径,如 C:\Synopsys\SCL\2021.12\win32\bin\lmgrd.exe
- Path to the license file:点击Browse浏览修改后license文件的路径,C:\Synopsys\SCL\2021.12\admin\license\synopsys.lic
- Path to the debug log file:输入路径 C:\Synopsys\SCL\2021.12\admin\logs\debug.log
- 在 Config Services 页面的下方勾选 Use Services和Start Server at Power Up。
- 点击 Save Service,选择 Yes 确认。如果出现没有使用 Windows 首选路径的警告,请单击 “OK”。
- 点击 Start/Stop/Reread 选项卡,确定您的服务器名称是高亮的状态,点击 Start Server。
- 通过查看 debug log 文件确保服务器已被正确启动。在 Config Services 选项卡点击 View Log,确认没有错误。

2. 在 Windows 系统安装 Simpleware ScanIP
- 正式用户在从 SolvNet 下载最新发布的 Simpleware 软件 Windows 版本安装包。
- 试用用户登录 Synopsys EVAL 网站,在历史订单页面下载 Simpleware 软件 Windows 版本安装包和 license 文件(即 key 文件)。
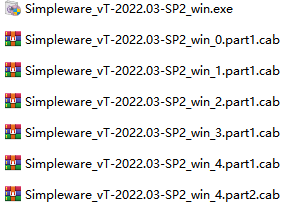
- 安装准备文件包含 1 个 .exe 文件和 6 个 .cab 压缩文件,首先将所有压缩文件解压,如有遇到解压不成功的情况请尝试换一种解压工具。
- 右键单击 Simpleware_vT-2022.03-SP2_win.exe,选择以管理员身份运行。
- 在 Software installation 对话框选择 Next。
- 在 Site Information 对话框,输入您的 Site ID、管理员和联系信息,点击 Next。
- 在 License Agreement 对话框,阅读协议内容,接受条款勾选 I accept the terms of the License Agreement,点击 Next。
- 在 Select Components 对话框,根据 license 包含的模块按以下操作:
- 如果您的 license 中不包括 Simpleware NURBS、Custom Modeler 或 Auto Segmenter 模块,请从下拉菜单中选择 Standard installation,然后单击 Next。
- 如果您的 license 中包括 Simpleware NURBS、Custom Modeler 或 Auto Segmenter 模块,请勾选相应模块并单击 Next。安装类型将自动更改为 Custom installation。
- 在 License Setup 对话框,根据以下不同情形输入 license 信息,点击 Next:
- Install a licence file (node locked):试用用户的 license 类型,点击 Browse… 选择 license 文件(即下载的key文件,内容无需修改)的路径,路径中不要有中文
- Use current license:针对的是已经有过浮动(floating)license,且没有改变 license 文件的位置
- Use a license server (floating):新的浮动(floating)license,选择 license server 正在运行的 license 文件位置。格式可以是license 文件(license server中指定的license文件)或是 port@server(如27020@192.168.1.86,此处应修改为您的 license server 所在 IP 地址)
- 在 Select Destination Location 对话框,指定软件安装位置,默认的为 C:\Program Files\Synopsys\Simpleware\T- 2022.03- SP2,点击 Next。
- Start Copying Files 页面将显示安装所需空间的概要,点击 Accept, Next。
- Simpleware ScanIP 开始安装,并询问您是否需要桌面图标。
无法通过远程桌面安装和使用 Node-locked license,只能在本地设备访问。
3. 在 Linux 系统安装 Simpleware ScanIP
Synopsys Installer 用于安装 Simpleware ScanIP 的 Linux 版本。如果您之前没有使用过,则需要先安装它。以 root 用户身份运行文件 SynopsysInstaller_v5.5.run,出现提示时指定 Synopsys Installer 的安装位置。
以 non-root 用户(或 root 用户的 -install_as_root)运行 Synopsys Installer,按照以下步骤安装。-gui 用于启动 GUI 版本。
- 输入信息:Site ID、Site Administrator、Contact Information,这些信息有助于快速获得技术支持。点击 Next >。
- 输入 source directory 路径:输入下载 Simpleware 文件所在路径,点击 Next >。Simpleware 文件为:
- simpleware_vT-2022.03-SP2_linux64.spf.part00
- simpleware_vT-2022.03-SP2_linux64.spf.part01
- simpleware_vT-2022.03-SP2_common.spf.
- 选择 destination directory:指定 Simpleware ScanIP 的安装位置,点击 Next >。
- 选择要安装的产品:应该只能够看到 Simpleware T-2022.03-SP2,勾选并点击 Next >。
- 同意 License Agreement:勾选 I have read the License Agreement,点击 I Accept。
- 配置产品:检查 Target Dir,确认勾选了正确的 Platforms,点击 Next >。
- 验证 summary 对话框的选中信息,然后依次点击 Accept、Install 安装软件。
- 如果您拥有 Simpleware ScanIP 的有效 license,在 home directory 引用名为 .ScanIP.lic 的纯文本文件(不存在的话就创建一个),或是环境变量中的 LM_LICENSE_FILE 或 SNPSLMD_LICENSE_FILE。
- Node-locked license(试用用户):输入电脑上存储 license 文件的路径
- Node-locked license(正式用户):输入license 服务器运行的位置,格式 port@server
有关 Synopsys Installer 的更多详情,可参考文件 SynopsysInstaller_ install_ 5.5.pdf