目录
如何为 QuantumATK 创建新的附加组件
在 QuantumATK,附加组件是包含一个或多个插件的 Python 模块,可用于向软件添加新功能。有几种类型的插件可供选择。本教程将关注允许 QuantumATK 读写新数据格式的插件类型。在本教程中包含了三个示例。第一个是从 XYZ 文件中读取分子构型的插件,第二个是读取电子密度的插件。 ^  ^
^
附加组件模块的基本结构
因为插件是包含在 Python 模块中的,所以它们应存在于自己的目录中。我们将研究一个读取 XYZ 文件的插件作为示例。它的目录结构如下:
XYZFilters/
    __init__.py
    XYZLabFloor.py
    XYZFileRawReader.py
init.py 文件是一个特殊文件,用于告诉 Python 该文件夹是一个模块。它还包含导入模块时执行的代码。对于插件,此文件还需要包含一些信息用用以告知 QuantumATK 关于它自身。
例一:读取 XYZ 文件的插件
XYZFilters 附加组件中的 init.py 文件包含以下代码:
1   import datetime
2   import XYZLabFloor
3
4   __addon_description__ = "Plugins for importing and exporting XYZ configurations."
5   __addon_version__ = "1.0"
6   __addon_date__ = datetime.date(year=2015, month=8, day=6)
7
8   __plugins__ = [XYZLabFloor.XYZLabFloor]
9
10   def reloadPlugins():
11      reload(XYZLabFloor)
此代码给出了附加组件的说明,分配版本号和上次更新的日期。它还定义了附加组件提供的插件列表。本例中,有一个 XYZLabFloor.py 文件,包含了一个名为 XYZLabFloor 的插件类。此外,还提供了一个名为 reloadPlugins 的函数,以便在源代码文件发生更改时,QuantumATK 可以重新加载插件。
我们现在来看一下包含插件类的 XYZLabFloor.py 文件的结构。在文件的顶部,我们导入了编写插件所需的模块和类:
1   import os
2
3   from API import LabFloorImporterPlugin
4   from API import LabFloorItem
5   from NL.CommonConcepts.Configurations.MoleculeConfiguration import MoleculeConfiguration
6   from NL.CommonConcepts.PeriodicTable import SYMBOL_TO_ELEMENT
7   from NL.CommonConcepts.PhysicalQuantity import Angstrom
8   from NL.ComputerScienceUtilities import Exceptions
9
10  from XYZFileRawReader import XYZFileRawReader
接下来我们需要定义插件类。插件必须从 QuantumATK 定义的特定类中继承。在这种情况下,我们将定义一个从 LabFloorImporterPlugin 继承的类:
13 class XYZLabFloor(LabFloorImporterPlugin):
这种类型的插件必须定义两种方式。第一种方式是 scan。该方法的作用是确定插件是否处理特定文件,如果是的话,则确定该文件包含哪种类型的 LabFloor 对象。它会将项目列表返回给 LabFloor。第二种方式是 load,负责解析文件并将对象加载到内存中。
对于我们的 XYZLabFloor 插件,scan 法定义如下:
18    def scan(self, filename):
19        """
20        Scans a file to check if it is supported by the plugin
21
22        @param filename : The path to be scanned.
23        @type           : string
24
25        @return A list of LabFloorItems
26        """
27        # Setup a resulting vector.
28        result = []
29
30        # Determine extension
31        basename = os.path.basename(filename)
32        no_extension_name, extension = os.path.splitext(basename)
33
34        # Return empty string if extension isn't ".xyz"
35        if extension != '.xyz':
36            return result
37
38        # Try to load configuration
39        try:
40            reader = XYZFileRawReader(filename)
41        except Exception:
42            return result
43
44        for molecule_idx in xrange(reader.numOfMolecules()):
45
46            # Read the comment for this molecule.
47            comment = reader.comment(molecule=molecule_idx)
48
49            # Create and add LabFloorItem to list
50            if reader.numOfMolecules() == 1:
51                title = no_extension_name
52            else:
53                title = no_extension_name + " (" + str(molecule_idx) + ")"
54
55            # Create labfloor item.
56            item = LabFloorItem(MoleculeConfiguration,
57                                title=title,
58                                tool_tip=comment,
59                                molecule_idx=molecule_idx)
60
61            # Add to result list.
62            result.append(item)
63
64        # Return the result list.
65        return result
该代码通过首先测试文件名中是否含有 “xyz” 的扩展名,然后尝试实际解析文件来检测文件是否为有效的 XYZ 文件。如果文件不是有效的 XYZ 文件,则返回空列表。如果它是有效文件,则读入文件中包含的每个分子,并为每个分子创建 LabFloorItem。
LabFloorItem 是一个 LabFloor 上表示项目的分类。它包含对象的类型,在本例中,它是 MoleculeConfiguration 以及标题和工具提示(当鼠标光标悬停在项目上时可见的文本)。有关该项目的额外信息也可以作为关键参数传递。正如我们将在下面看到的,这些参数将传递给 load 方式。
当用户与项目交互时,QuantumATK 会调用 load 方式。例如,当使用 viewer 可视化结构或将其导入 builder 时会发生这种情况。Load 法的定义为:
67    def load(self, filename, molecule_idx=0):
68        """
69        Load the desired object in memory.
70
71        @param filename : The path of the XYZ-file.
72        @type           : string
73
74        @return Desired object (MoleculeConfiguration)
75        """
76        # Read the file
77        reader = XYZFileRawReader(filename)
78
79        # Lists of elements and positions.
80        elements = []
81        positions = []
82
83        # Loop over atoms.
84        for atom in reader.atomList(molecule=molecule_idx):
85            elements.append(SYMBOL_TO_ELEMENT[atom["element"]])
86            positions.append(atom["coords"]*Angstrom)
87
88        # Create configuration.
89        configuration = MoleculeConfiguration(
90            elements=elements,
91            cartesian_coordinates=positions)
92
93        return configuration
该方式读取文件内容并提取所要求分子的元素和位置。该方法被传递了要读取分子的索引(信息存储在 scan 式中创建的 LabFloorItem 中)并创建了一个 MoleculeConfiguration。MoleculeConfiguration 类是 QuantumATK 中表示分子的方式。对于周期系统,有一个相应的 BulkConfiguration 类,用于存储晶格矢量以及坐标和元素。
此附加组件的完整源代码可在此处下载 ↓ source code。
例二:导出构型的插件
在此示例中,我们将编写一个插件以允许 QuantumATK 将结构导出到 XYZ 文件。该模块的目录结构如下所示:
XYZExporter/
    __init__.py
    XYZExporter.py
第一步是编译 init.py 文件:
1   import datetime
2   import XYZExporterPlugin
3
4   __addon_description__ = "Plugins for exporting XYZ files."
5   __addon_version__ = "1.0"
6   __addon_date__ = datetime.date(year=2015, month=8, day=6)
7
8   __plugins__ = [XYZExporterPlugin.XYZExporterPlugin]
9
10   def reloadPlugins():
11    reload(XYZExporterPlugin)
下一步就是要编写真正的插件类。在之前的示例中,插件类是从 LabFloorImporterPlugin 类派生的,表明它是一个用于导入数据的插件。但本例的插件将派生自 ExportConfigurationPlugin。这些插件用于扩展 builder 支持的导出格式数量。打开构建器后,可以选择 File→Export 查看支持的文件格式列表。
从 ExportConfigurationPlugin 继承的类必须执行四种方式:title,extension,canExport 和 export。Title 式需要返回此类文件的名称 (“XYZ”)。Extension 式应该返回文件扩展名 (“xyz”)。canExport 式确定此插件是否支持结构类型(MoleculeConfiguration,BulkConfiguration,DeviceConfiguration 或 NudgedElasticBand)(XYZ文件仅支持 MoleculeConfiguration 对象)。最后,export 式是将结构传入并写进磁盘的位置。
以下为 XYZExporterPlugin.py 文件中 XYZExporterPlugin 的代码:
1      from NL.CommonConcepts.Configurations.MoleculeConfiguration import MoleculeConfiguration
2      from NL.CommonConcepts.PhysicalQuantity import Angstrom
3
4      from API import ExportConfigurationPlugin, showMessage
5
6      class XYZExporterPlugin(ExportConfigurationPlugin):
7          """ Class for handling the export of the XYZ input files. """
8
9          def title(self):
10              """ Return the title file selection dialog. """
11
12              return 'XYZ'
13
14          def extension(self):
15              """ The default extension of XYZ. """
16
17              return 'xyz'
18
19          def export(self, configuration, path):
20              """
21              Export the configuration.
22
23              @param configuration : The configuration to export.
24              @param path          : The path to save the configuration to.
25
26              @return None
27              """
28
29              # XYZ files only supports molecules.
30              if not isinstance(configuration, MoleculeConfiguration):
31                  showMessage('XYZExporter can only export MoleculeConfigurations')
32                  return
33
34              # Open the file with write permission.
35              with open(path, 'w') as f:
36
37                  # Get the total number of atoms.
38                  number_of_atoms = len(configuration)
39
40                  # Write out the header to the file.
41                  f.write('%i\n' % number_of_atoms)
42                  f.write('Generated by XYZExporter\n')
43
44                  # Get the list of atomic symbols.
45                  symbols = [ element.symbol() for element in configuration.elements() ]
46                  # Get the cartesian coordinates in units of Angstrom.
47                  coordinates = configuration.cartesianCoordinates().inUnitsOf(Angstrom)
48
49                  # Loop over each atom and write out its symbol and coordinates.
50                  for i in xrange(number_of_atoms):
51                      x, y, z = coordinates[i]
52                      f.write('%3s %16.8f %16.8f %16.8f\n' % (symbols[i], x, y, z))
53
54
55          def canExport(self, configuration):
56              """
57              Method to determine if an exporter class can export a given configuration.
58
59              @param configuration : The configuration to test.
60
61              @return A bool, True if the plugin can export, False if it cannot.
62              """
63
64              supported_configurations = [MoleculeConfiguration]
65
66              return isinstance(configuration, supported_configurations)
此附加组件的完整源代码可在此处下载 ↓ source code。
例三:读取电子密度的插件
在这个例子中,我们将创建一个读取电子密度数据的新插件。在本教程中,我们将为存储在 NumPy 二进制 .npz 文件中的 3D 网格数据定义一种新格式。
构造密度
此代码将定义电子密度并将其保存到文件 ↓ electron_density.npz。以下将是我们的插件将读取的密度文件。
1   import numpy
2
3   # Define a orthogonal cell.
4   cell = numpy.array( [ [ 5.0, 0.0, 0.0 ],
5                         [ 0.0, 5.0, 0.0 ],
6                         [ 0.0, 0.0, 5.0 ] ] )
7   # Create a 3D grid of points from 0 to 5 in x, y, and z.
8   x = numpy.linspace(0.0, 5.0)
9   y = numpy.linspace(0.0, 5.0)
10   z = numpy.linspace(0.0, 5.0)
11   xx, yy, zz = numpy.meshgrid(x, y, z, indexing='ij')
12
13   # Define an electron density as a Gaussian centered at (2.5, 2.5, 2.5) times a
14   # sine wave in the x direction.
15   density = numpy.exp(-(xx-2.5)**2 - (yy-2.5)**2 - (zz-2.5)**2) * numpy.sin(yy-2.5)
16
17   # Save the cell and density to a .npz file.
18   numpy.savez('electron_density.npz', cell=cell, density=density)
这种电子密度不是物理意义上的,因为它在某些地方会是负的,但它可以让我们轻易地仔细检查数据是否被正确读取。可以在此处下载脚本 ↓ source code。
编写 NPZ 滤波器附加组件
附加组件的目录结构如下所示:
NPZFilters/
    __init__.py
    NPZLabFloor.py
与前面的示例一样,我们将首先关注 init.py 文件:
1   import datetime
2   import NPZLabFloor
3
4   __addon_description__ = "Plugin for reading a NPZ formatted electron density."
5   __addon_version__ = "1.0"
6   __addon_date__ = datetime.date(2014, 9, 1)
7
8   __plugins__ = [NPZLabFloor.NPZLabFloor]
9
10   def reloadPlugins():
11       reload(NPZLabFloor)
这里没有什么新的内容。现在我们需要定义实际的插件类:
1   import numpy
2   import os
3
4   import NLEngine
5
6   from API import LabFloorImporterPlugin
7   from API import LabFloorItem
8   from NL.Analysis.ElectronDensity import ElectronDensity
9   from NL.Analysis.GridValues import GridValues
10   from NL.ComputerScienceUtilities.NLFlag import Spin
11   from NL.CommonConcepts.PhysicalQuantity import Angstrom
12
13class NPZLabFloor(LabFloorImporterPlugin):
14    """
15    Class for handling the importing of NPZ-files as LabFloor items.
16    """
17
18    def scan(self, filename):
19        """
20        Scans a file to check if it is supported by the plugin
21
22        @param filename : The path to be scanned.
23        @type           : string
24
25        @return A list of LabFloorItems
26        """
27        # Setup a vector for the LabFloorItems that will be returned.
28        lab_floor_items = []
29
30        # Determine extension
31        basename = os.path.basename(filename)
32        no_extension_name, extension = os.path.splitext(basename)
33
34        # Return an empty list if the extension isn't ".npz"
35        if extension != '.npz':
36            return []
37
38        item = LabFloorItem(ElectronDensity,
39                            title='NPZ Electron Density',
40                            tool_tip='NPZ Electron Density')
41
42        # Add to the list of items.
43        lab_floor_items.append(item)
44
45        # Return the list of items.
46        return lab_floor_items
47
48    def load(self, filename):
49        """
50        Load the desired object in memory.
51
52        @param filename : The path of the NPZ-file.
53        @type           : string
54
55        @return Desired object (MoleculeConfiguration)
56        """
57
58        # Read the file
59        npz = numpy.load(filename)
60
61        # Create an "empty" ElectronDensity object.
62        electron_density = ElectronDensity.__new__(ElectronDensity)
63
64        # We will now fill out a dictionary that contains the information
65        # needed by the ElectronDensity class.
66        data = {}
67
68        # The "data" key is the electron density. The units must be given in the
69        # "data_unit" key. The array should have have the x-axis as the first
70        # dimension, the y-axis as the second, and the z-axis as the third.
71        data['data'] = npz['density']
72
73        # The data in "data" has no units so they are assigned here.
74        data['data_unit'] = 1.0 * Angstrom**-3
75
76        # Set the origin to be at zero.
77        data['origo'] = numpy.zeros(3)
78
79        # The cell must be given in Bohr units.
80        data['cell'] = npz['cell']
81
82        # The boundary conditions are expressed as a list of 6 numbers that should
83        # map to:
84        # { Dirichlet, Neumann, Periodic, Multipole };
85        # A value of 2 corresponds to "Periodic".
86        data['boundary_conditions'] = [2, 2, 2, 2, 2, 2]
87
88        # Construct the GridValues specific part of the object.
89        GridValues._populateFromDict(electron_density, data)
90
91        # Set the spin_type to unpolarized.
92        spin_type = NLEngine.UNPOLARIZED
93        electron_density._AnalysisSpin__spin_type = spin_type
94
95        sp = Spin.All
96        electron_density._AnalysisSpin__spin = sp
97        electron_density._setSupportedSpins(sp)
98
99        return electron_density
这个附加组件的完整代码可在此处下载 ↓ source code。
如何安装附加组件
有两种不同的安装附加组件的方法。第一种,设置环境变量 QUANTUM_ADDONS_PATH 到插件模块所在的目录。例如,在先前的章节中 NPZFilters 附件的路径为 $HOME/AddOns/NPZFilters,然后设置环境变量为 QUANTUM_ADDONS_PATH=$HOME/AddOns 即可。
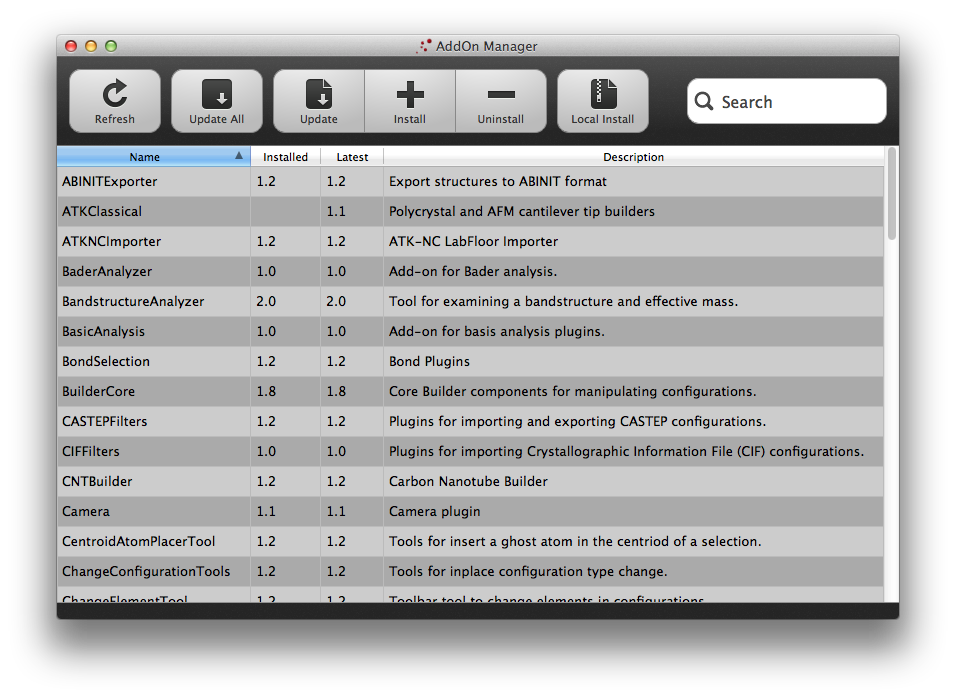
另一种方法是压缩 Python 模块并通过图形界面安装。第一步是创建一个包含该模块的 zip 文件。按照上一段中的 NPZFilter 示例,可以通过运行 zip -r NPZFilters.zip $ HOME / AddOns / NPZFilters 来完成。然后,在 QuantumATK 中,Help 菜单下面有一个名为 AddOn Manager 的选项。打开 AddOn Manager 将会呈现出如下所示的窗口:
点击 Local Install,出现一个文件对话框。选择 NPZFilters.zip,QuantumATK 将安装插件到 QUANTUM_ADDONS_PATH。
测试 NPZ 滤波器附加组件
按照上一节中的步骤操作后,现在应该已经安装上了 NPZFilters AddOn。您可以通过拉出 AddOn Manager 并查看列表中的 NPZFilters 再次确认已安装。如果我们在 QuantumATK 中创建一个新项目,且该文件夹包含我们创建的 electron_density.npz 文件,那么 ElectronDensity 对象就应该显示在 lab floor 上。
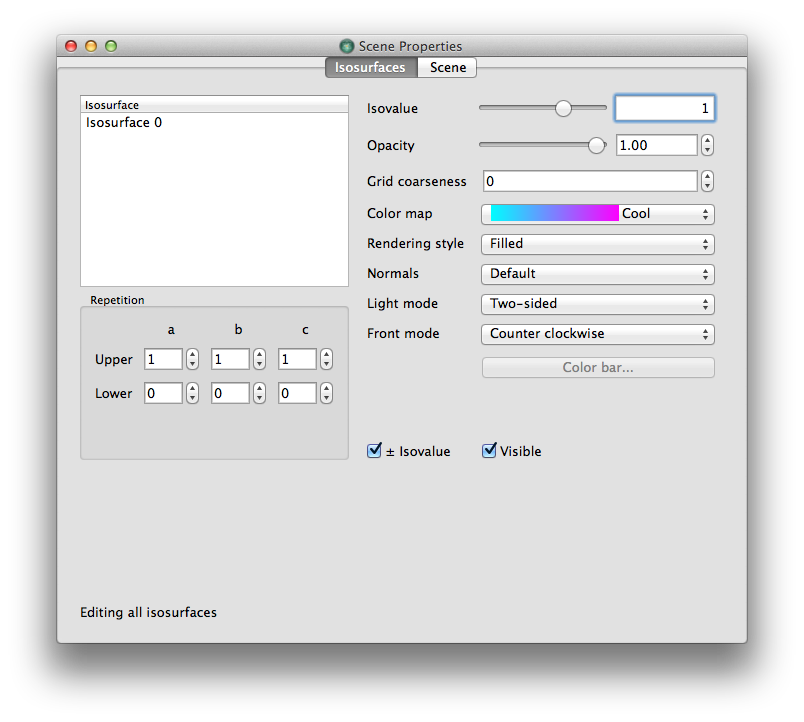
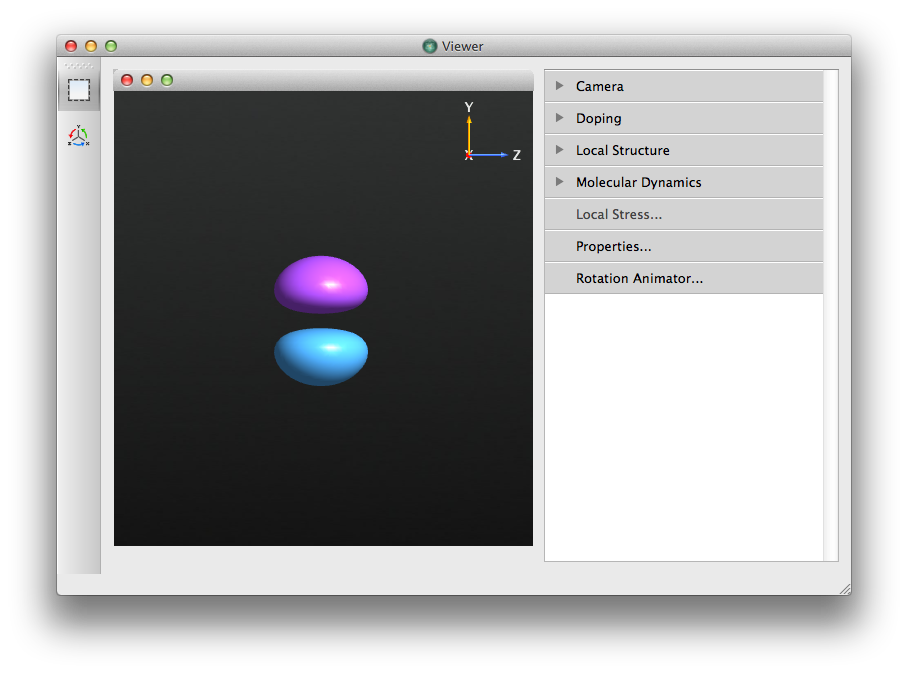
点击右侧面板上的 Viewer… 按钮将电子密度可视化。在出现的对话框中,有 isosurface 和 cut plane 可供选择。选择 isosurface。默认的 isosurface 值是平均电荷密度,对于我们的电荷密度来说为零(因为一半是负,一半是正)。单击右侧面板中的 Properties … 按钮,将 Isovalue … 滑块拖动到接近 1 的地方。
得到的等值面现在应该看起来像哑铃,两种不同的颜色分别代表负密度和正密度的区域,以及通过 x-z 轴的零密度平面。这证实了我们在模型密度函数中的读取结果正确。


